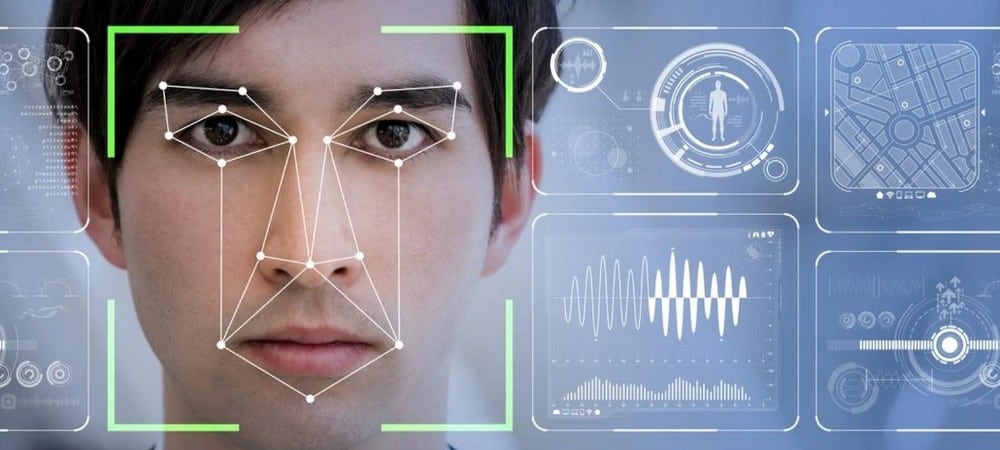
Face Detection with Face-api.js
Face-api.js is a JavaScript library for detection and recognition of human faces. It makes use of the tensorflow.js core API. It works perfectly inside the web browser. Besides the bounding box and face landmarks, it also provide additional features like recognizing facial expression, estimating age and gender.
For me, the idea of detecting faces in the browser felt quite fascinating to try out. In this article, I am going to show you how to perform robust face detection in the webcam using this library. Turn on your webcam and let’s see how cool it is.
Face detection demo
1. Please allow permission to access camera.
2. If you are browsing through social media built in browsers, look for the … or browser icon on the right top/bottom corner, and open the page in Sarafi (iPhone)/ Chrome (Android)
GitHub repository
You can download the complete code of the above demo in the link below:

Streaming webcam on desktop computer or mobile, there is function to switch back or front cameras on mobile
Implementation
Pretty cool, eh? Let’s go into the technical details further below, I will show you step by step how to build this face detection application with face-api.js.
Folder Structure
To get started, let’s organize the folder and files nice and clean, so that it is more maintainable.

- images – contain images
- js – contain javascript files
- face-api.min.js – face detection and recognition javascipt library
- face-detection.js – main application javascript
- models – contain pre-trained models and weights for face detection
- style – contain css style file
- face-detection.html – main html file
# Step 1 : Include face-api.js
First of all clone or download the face-api.js repository from GitHub
git clone https://github.com/justadudewhohacks/face-api.js.git
If you are using npm, you can also install it by running the command below
npm i face-api.js
From the dist folder, simply include the script face-api.js or the minified version face-api.min.js in the <head> section of the html file. I also include the jquery library as well.
<html>
<head>
    <script src="https://code.jquery.com/jquery-3.3.1.min.js"></script>
    <script src='js/face-api.min.js'></script>
</head>
# Step 2 : Stream webcam to browser
To stream your webcam into the browser, I utilize the JavaScript library navigator.mediaDevices.getUserMedia. To find out more details about that, please refer to my previous blog : How to access webcam and take photo with JavaScript
# Step 3 : Load the models
There are pre-trained models for face detection, face recognition, face landmarks, face expression, age and gender, which you can find in the weights folder of the face-api.js repository.
The model files can simply be provided as static assets in your web app or you can host them somewhere else and they can be loaded by specifying the route or url to the files. Let’s say you are providing them in a models directory
const modelPath = 'models';

$("#model-switch").change(function () {
  if(this.checked){
    $(".progress-bar").removeClass('d-none');
    Promise.all([
      faceapi.nets.tinyFaceDetector.load(modelPath),
      faceapi.nets.faceLandmark68TinyNet.load(modelPath),
      faceapi.nets.faceRecognitionNet.load(modelPath),
      faceapi.nets.faceExpressionNet.load(modelPath),
      faceapi.nets.ageGenderNet.load(modelPath)
    ]).then(function(){
      $(".progress-bar").addClass('d-none');
      toggleContrl("detection-switch", true);
    })
  }
  else {
    toggleContrl("detection-switch", false);
  }
});
# Step 4 : Start face detection
When detect face switch (checkbox) turn on (checked), first call function createCanvas() to create a canvas element for drawing, then call function startDetection() to start face detection and drawing results.
When detect face switch (checkbox) turn off (unchecked), clear the interval function and the canvas rectangle.
$("#detection-switch").change(function () {
  if(this.checked){
    createCanvas();
    toggleContrl("box-switch", true);
    toggleContrl("landmarks-switch", true);
    toggleContrl("expression-switch", true);
    toggleContrl("age-gender-switch", true);
    $("#box-switch").prop('checked', true);
    $(".spinner-border").removeClass('d-none');
    startDetection();
  }
  else {
    clearInterval(faceDetection);
    toggleContrl("box-switch", false);
    toggleContrl("landmarks-switch", false);
    toggleContrl("expression-switch", false);
    toggleContrl("age-gender-switch", false);
    if(typeof canvas !== "undefined"){
      setTimeout(function() {
        canvas.getContext('2d').clearRect(0, 0, canvas.width, canvas.height)
      }, 1000);
    }
  }
});
function createCanvas() to create a canvas element from video camera, preparing the overlay canvas by matching the display size.
function createCanvas(){
  if( document.getElementsByTagName("canvas").length == 0 )
  {
    canvas = faceapi.createCanvasFromMedia(camera)
    document.getElementById('webcam-container').append(canvas)
    faceapi.matchDimensions(canvas, displaySize)
  }
}
function startDetection() to utilize the faceapi.detectAllFaces and other high level drawing functions. As you would move in your webcam, so this is defined as an interval function, which would wipe off the canvas, detect face and draw bounding box, landmarks, expressions, age and gender every 300 milliseconds.
function startDetection(){
  faceDetection = setInterval(async () => {
    const detections = await faceapi.detectAllFaces(camera, new faceapi.TinyFaceDetectorOptions()).withFaceLandmarks(true).withFaceExpressions().withAgeAndGender()
    const resizedDetections = faceapi.resizeResults(detections, displaySize)
    canvas.getContext('2d').clearRect(0, 0, canvas.width, canvas.height)
    if($("#box-switch").is(":checked")){
      faceapi.draw.drawDetections(canvas, resizedDetections)
    }
    if($("#landmarks-switch").is(":checked")){
      faceapi.draw.drawFaceLandmarks(canvas, resizedDetections)
    }
    if($("#expression-switch").is(":checked")){
      faceapi.draw.drawFaceExpressions(canvas, resizedDetections)
    }
    if($("#age-gender-switch").is(":checked")){
      resizedDetections.forEach(result => {
        const { age, gender, genderProbability } = result
        new faceapi.draw.DrawTextField(
          [
            `${faceapi.round(age, 0)} years`,
            `${gender} (${faceapi.round(genderProbability)})`
          ],
          result.detection.box.bottomRight
        ).draw(canvas)
      })
    }
    if(!$(".spinner-border").hasClass('d-none')){
      $(".spinner-border").addClass('d-none')
    }
  }, 300)
}
Finally, testing on browser
For desktop, point your localhost to the cloned root directory, set up https in IIS
Browse to https://localhost/face-detection.html
For mobile, first connect to the same wifi as your desktop, open a command window on your desktop, and type below command to find out your internal IP Address, which should be something 192.168.*.*
> ipconfig
Once you find out your internal IP Address, just replace the localhost in the above link with your internal IP Address and browse on your mobile.
Switch on the Webcam, then the browser will ask you for permission to access camera, click Allow.

Warning! I have notice that on IOS Safari, cameras can only be accessed via the https protocol
Here we go! That’s me, and as you can see, it detect my face with a confident level of 96%, drawing bounding box and landmarks. Note that when I move slowly, the algorithm can also keep up.

Face-api.js is an amazing open source project. From this article I hope you have fun and got a better idea how to use this api.
Thank you for reading. If you like this article, please share on Facebook or Twitter. Let me know in the comment if you have any questions. Follow me on Medium, GitHub and Linkedin. Support me on Ko-fi.
8 Comments
but I want to congratulate you on the project and show you how it is possible to accomplish such a cool feat, what I would like to know is how to make the face comparison with a photo or image saved in a folder or database, and showing on the screen is the same or has 80% similarity
Hi Rodrigo, compare face similarity fall into the face recognition technique, I might write a blog to give some demo later. You can have a look at this youtube video explain how to use face-api.js to do face recognition https://www.youtube.com/watch?v=AZ4PdALMqx0
And this github repository example could be useful for you: https://github.com/justadudewhohacks/face-api.js/blob/master/examples/examples-browser/views/bbtFaceSimilarity.html
Thanks man. I have played around with OpenCV in the past and I thought about getting a bit into tensorflow for a while. Your article added to my motivation to do a fun project for my daughter. Your articles and code examples are very helpful. I will share your content on facebook! 🙂
I am glad that you find my article helpful.
Hi Benson, thanks for sharing your knowledge. I’m trying to study this face recognition segment, as I don’t have much knowledge (I’m a beginner). Hehehe.
Studying and running your application, I managed to change and point to the models directory, but when I try to run, the application keeps looking for the models, but it can’t load. I’ve tried everything I could, even climbing a hosting with SSL, but I couldn’t work.
Can you give me a hand?
Thank you in advance for your help!
Yes, of course I can help you with this. First, I would recommend double-checking that the path you have set for the models directory is correct. Additionally, make sure that the models you are trying to load are compatible with the version of the application you are running. If you are still having trouble, please provide more details about your setup and the exact error message you are receiving, and I will be happy to help you further.
I felt I should give you some feedback, I’ve done some work based on your research.
1º face.ceuvago.com
2º desaparecidos.ceuvago.com
this second one is a demonstration for a specialization work, where the proposal was to create an application where families of disappeared people upload the photos, the snapshots are extracted, and in a second layer people on the street could use their cameras to verify if people who live on the street or are disoriented on the street are registered through facial recognition